Do you want a computer to finish your Linux programme for you? If so, try out ShellGPT, which can finish your Ubuntu Terminal tasks with the help of ChatGPT. You don’t have to remember complicated Linux orders; just tell the Chatbot to run them. Therefore, we will see in this tutorial, that how to install and use ChatGPT in linux.
Introduction to ShellGPT
ShellGPT is an open source command line tool for Linux that uses ChatGPT to create shell commands, code snippets, notes, and AI chat, among other things, using terminal.
It is made by a group of writers, and the project’s source code can be found on the ShellGPT GitHub page. This tool was made to help people who like to use the command line and don’t want to use Google to find answers to their problems. This will save you a lot of time in the long run, especially if you are new to Linux.
With just a few words about the Shell tasks or scripts you want, the tool will do the job easily. Also, since ShellGPT is an open source tool, anyone can use it for free and make changes to it. Its community-driven development method also makes sure that the project keeps up with the latest changes in the field.
For example, you might want to know the usual Nginx path on your Ubuntu or any other Linux. Then just ask ShellGPT what the way is, and it will give you an exact answer. For another example, say you want to make a Docker container that runs an Apache web server and maps the 80 or 443 ports of the container to the 80 or 443 ports of the host. Then you can just tell ShellGPT to do it.
The GPT-3.5 language model is also used by this AI for Shell tasks. One thing that makes it stand out is that it can understand input in normal language and offer Shell commands based on the situation.
ShellGPT is a flexible and customizable open-source tool. This means that users can change its output and how it works to fit their needs.
Don’t worry if you’re still confused. In this piece, we explain how to install ShellGPT and use it to do different things on our Linux machine.
Install ShellGPT on Ubuntu server
Since the tool we’ll be using is based on Python, this article is not only applicable to Ubuntu users; it can also be used by those using Linux Mint, AlmaLinux, Rocky, Fedora, Debian, and other distributions of Linux.
Step 1: Although PIP, a Python package management, will be used here, it is best to start with the system update command as a best practise.
# apt-get update && apt-get upgrade -yStep 2: ChatGPT is built on Python, and so is ShellGPT. If we want to use this command line tool on Linux, we need to have the Python language loaded. Python version 3 will already be on all of the most recent Ubuntu computers, especially laptops. So, let’s first see if it’s already in our system.
# python3 -V
If nothing comes out, it’s not installed on your machine. So, to get it, type in the following command or follow this artcle:
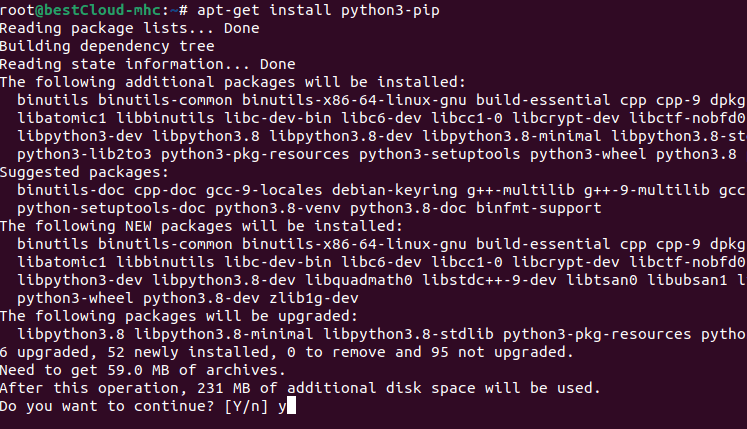
# apt-get update && apt-get install python3Step 3: Install python pip. The people who made ShellGPT made it available through PIP, which is a famous Python package manager that helps apps handle the tools and packages they need. But, unlike Python, PIP doesn’t come with Ubuntu Linux by default, so we have to install it ourselves. So, here is the order to make that happen.
# apt install python3-pip
To check the installed version of pip, use below command:
# pip -V
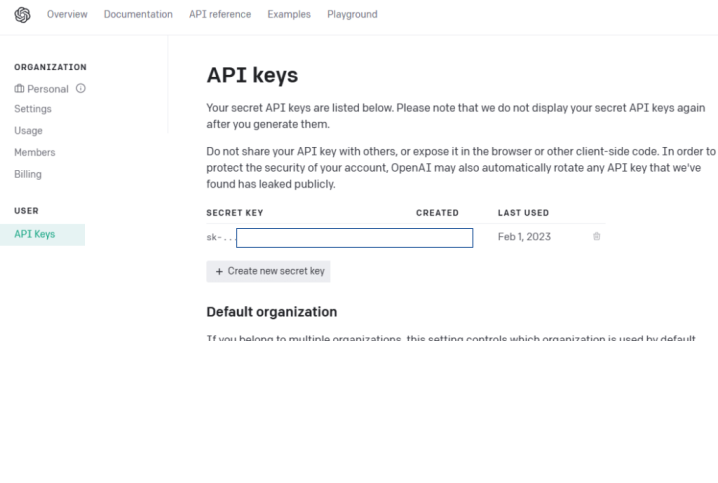
Step 4: Now we need to generate API key of OpenAI. ShellGPT can’t do anything on its own; it’s just a way to add ChatGPT features from OpenAI to your Linux shell. We need an API (Application Programming Interface) key because of this. It let the Terminal use ChatGPT through your OpenAI account, no matter if it was free or if you had to pay for it.
Note !
If you use the API key, OpenAI gives you a free $18.00 credit to use it. Once the free requests have been used up, the person has to pay $0.03 per 1K tokens.
So, below are the steps to make an OpenAI API key that you can use in Linux Terminal:
- Open the Open AI Website
- Those who already have an OpenAI account can just click the “Login” button, enter their login information, or use one of the social login options. While the rest of the new users need to use the Signup link to make an OpenAI account.
- Once you’ve logged in, choose the API keys under the USER area from the menu on the left.
- Now, Click on the Create new secret key button from “the API keys page of OpenAI.”

- Your API Key will show up in a pop-up window. Just copy that and move on to the next step.
Step 5: Install ShellGPT (ChatGPT) for Linux. Now, to use ChatGPT on the Linux terminal, all you have to do is run the given PIP command. This will install ShellGPT and the tools it needs to work properly on our Linux machine. PIP can be used not only to install ShellGPT, but also to get changes and to remove it.
# pip install shell-gpt --userStep 6: Now set the server environmental variables. Once the installation is done, add /.local/bin to your system’s path so that the SGTP file in the BIN folder can be run from anywhere in the Terminal, no matter where we are in the command line’s directory.
# vi .bashrc
## append the below line in this file
export PATH=$PATH:~/.local/bin
Source the updated Bashrc file in order for the changes you made to take effect.
# source .bashrcStep 7: Now, Add the API key to the ShellGPT configuration file. By default, the tool makes a setup file that controls how ShellGPT works. We change this file to include the API key we just made.
# vi ~/.config/shell_gpt/.sgptrc
##Add the below line on top of the file
OPENAI_API_KEY=your-API-key
Step 8: At last, the ShellGPT will be installed on our Linux machine. Let’s run a few tasks to see how it works. Here are some examples:
“sgpt” is the tool you use at the command line for ShellGPT.
Step 9: Now test the installation of ChatGPT by asking our terminal to list the complete details of the system RAM
# sgpt --shell --execute "list free hard disk space and RAM on this system"And this is how, you have learnt how to install and use ChatGPT in Linux


